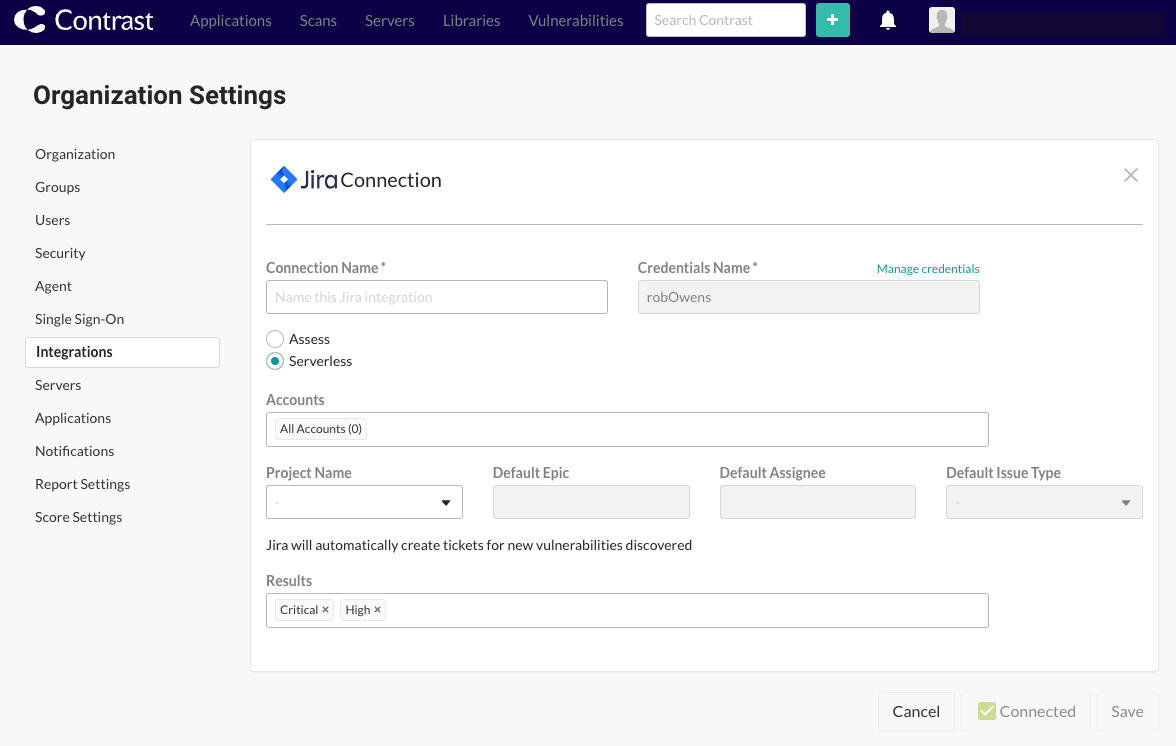
Configure Jira for Serverless
After testing your Jira connection, you can configure Jira to choose a subset of severities and result categories from which the integration should create a Jira ticket.
Before you begin
Make sure you are connected with Jira and have AWS accounts in Contrast
Steps
After Contrast connects to Jira, select Add configuration to configure the AWS accounts from which results will have Jira tickets created.

Enter the following details:
Connection Name: Choose a name for the Jira integration you are creating
Credentials Name: Enter the desired credentials to be used for authentication
Click the Manage Credentials link above the Credentials Name field to edit or create new credentials.
Enter the following details:
Credentials Name: the name you entered in the previous step
URL: Provide the URL for your Jira instance
Username
Enter the API Key. To authenticate calls from Contrast, you need to provide an API Key for Jira.
Click the information icon next to the API Key field name and click the Get Started link.
Click Create API Token.
Enter a name.
Click Create.
Click Copy to copy the API token to your clipboard.
Go back to Contrast and paste the API token into the API Key field.
Click Test Connection to test the connection.
Click Save or Done.
Select the Serverless option to begin creating Jira tickets for vulnerabilities related to specific applications or accounts.
Enter the desired Accounts for which Jira tickets should be created.
Choose a Jira Project in which Contrast should create tickets.
Set the Default Epic. Specify the Epic under which the new tickets should be created (if applicable).
Set the Default Assignee. Specify the person who should be assigned to the tickets.
Set the Default Issue Type. Choose the default issue type for the created tickets (for example, Task / Story / Bug).
Note
Changing the Project or Default issue type also changes the related Jira fields and values available to you. Contrast will keep any selected values that also apply to the new project or issue type.
Choose the type of Results for which Contrast should create tickets.
Permissions
Exploits
Dependencies (CVEs)
Severity (Note, Low, Medium, High, Critical)
After configuring the Default Issue Type, you need to provide additional Jira fields.
Select Add Jira field.
Add the Reporter, T-Shirt Size, and Work Type fields
Map the Contrast severity levels to the corresponding Jira severity levels (for example, Critical, Major, Standard) as needed.
Select Save and begin using your Jira integration. To remove the integration select Delete configuration.
Watch the following video for a demonstration of the integration steps.
Watch the following video for detecting a new vulnerability.