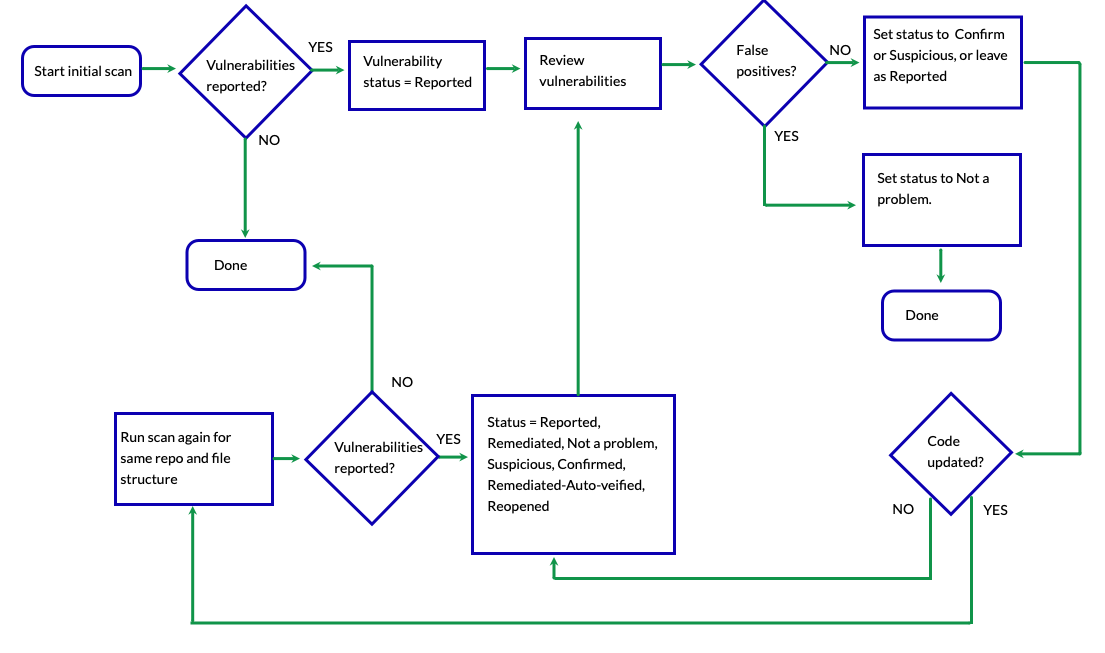
Contrast Scan vulnerability workflow
This topic provides workflow guidelines for managing the vulnerabilities that Contrast Scan reports.
Diagram: Scan vulnerability workflow
This diagram shows a suggested workflow for managing vulnerabilities that Contrast Scan reports.

Workflow for managing scan vulnerabilities
Create a scan project and run the scan.
Each time you run a scan for a specific project, ensure you are using the same repo and file structure.
Contrast sets the status for new vulnerabilities to Reported.
Review the findings.
If the reported vulnerabilities are false positives or do not require code changes, change the status to Not a Problem and add a comment.
If the finding is a true positive, change the vulnerability status to Confirmed to indicate that the the development team should fix the code.
If the finding is true based on the details of the vulnerability, but the vulnerability requires additional investigation to determine its validity, changing the status to Suspicious might be appropriate.
Fix the code or exclude irrelevant files and folders.
Run the scan again.
If the vulnerability is not found in a subsequent scan, Contrast changes its status to Remediated.
If Contrast detects a vulnerability with a status of Not a Problem, Confirmed, or Suspicious in a subsequent scan, Contrast keeps the current status.
If you exclude files or folder file related to a previously reported vulnerability and the vulnerability had a status of Confirmed or Suspicious, Contrast changes the status to Remediated if the scan no longer detects the vulnerability.
If a vulnerability had a status of Remediated and the vulnerability is detected in a subsequent scan, Contrast changes the status to Reopened.
If the vulnerability has a status of Remediated for five scans, Contrast changes the status to Remediated Auto-Verified.
Repeat steps 2 through 4 until you address all the vulnerabilities.