Set up the platform with Deployment Hub
This quick guide will help you set up and run the platform using the Deployment Hub guidance. The steps are actions carried out during the deployment of the platform setup. Refer to the links and videos in each step for in-depth exploration of any topic.
Before you begin
Make sure you have everything you need before you start.
The agent will need to be able to reach your Contrast-hosted instance. A proxy can be configured if the environment has limited network access.
Confirm your administrator user permissions are enabled and assigned a role to ensure appropriate visibility within the system
Get started
Follow the instructions provided in the welcome email to complete the registration process and get access to Contrast Security.
Open Deployment Hub:
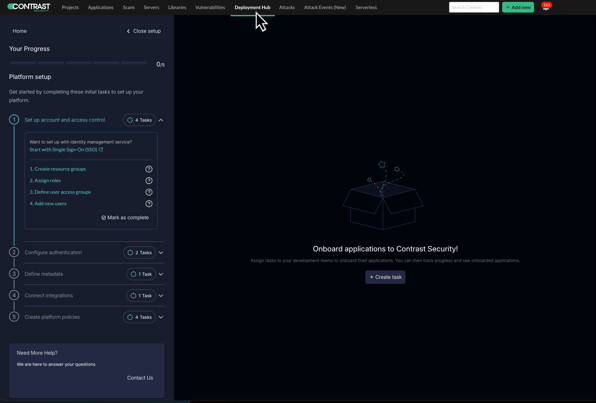
If you are using Contrast, select Administration > Deployment Hub in the header to open the step-by-step guidance.

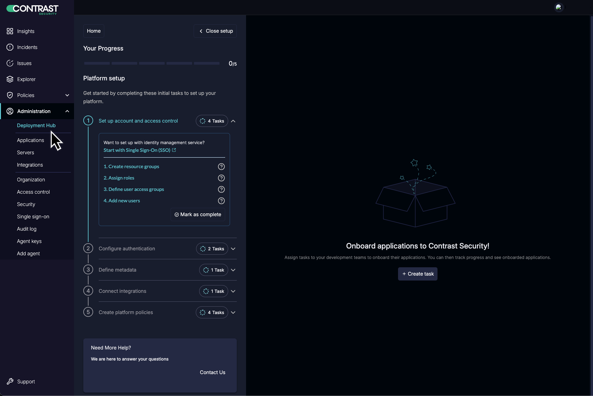
If you are using Northstar, in the left navigation, select Deployment Hub under the Administration option to open the step-by-step guidance.

Continue with the platform setup.
Complete platform setup
Complete the five steps under the Deployment Hub guidance to set up the platform. For more information, see the videos and documentation in the links under each step.
This first step involves organizing your resources and users. You will create resource groups to categorize resources, define custom roles to set user permissions for applications and settings, and then organize users into access groups based on these roles and permissions.
In this step, you will integrate your organization's Single Sign-On (SSO) solution for a seamless login experience for your users. Additionally, you will configure essential security settings.
This step focuses on providing relevant information and configurations for your applications. Enter the necessary details in the Application metadata fields.
Here, you will select and connect supported integrations with the platform. This process helps streamline your workflows and improves overall visibility.
The final step includes defining compliance policies for applications, managing library compliance, and setting up a vulnerability management policy.
Assign tasks for agent onboarding
When the platform setup steps are complete, assign the tasks for agent deployments.
Select the +Create task button at the upper-right.
Enter the task name.
Assign the task to a designated user, establish a due date, and select the requisite technologies.
Add metadata as required.
Select the Create task button to assign the task.
Emails are sent to the assigned user to alert them of the required task.
Manage tasks
When tasks are assigned, the status of each task can be viewed on the Tasks table. Tasks can be edited, duplicated, and deleted and assigned users will be alerted of the changes.
Examine the newly generated task to ensure all parameters are correctly configured and presented.
Select Task complete when the task work is approved and ready to close.