Deny or allow IP addresses (Northstar)
Use IP denylists or IP allowlists to manage IP addresses in your organization.
Note
Any implemented restrictions do not apply to support users who access the system through impersonation.
Before you begin
If you are using route-based access control, Access and permissions lists the actions that are required.
To block an IP address for a single incident, see Block IP addresses for an incident.
You can use Classless Inter Domain Routing (CIDR) notation to specify a subnet mask.
Steps
In the left navigation, under Policies, select IP management.
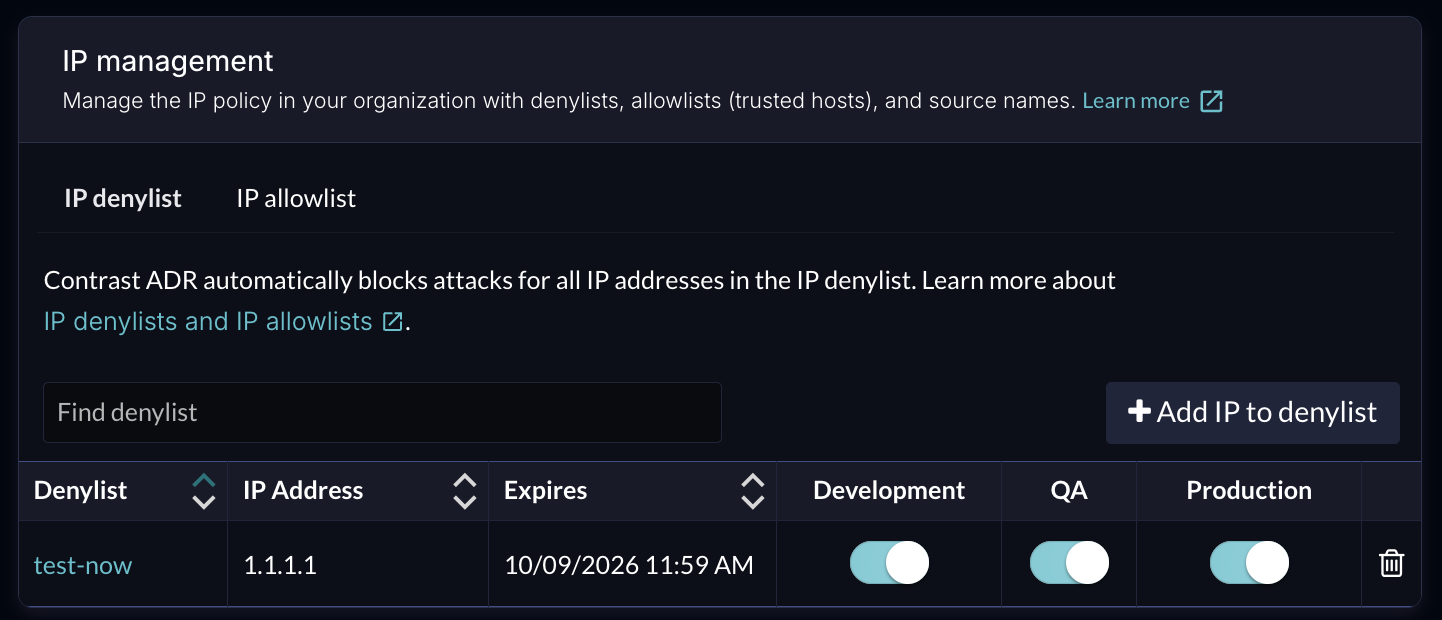
Manage denylists:
Select the IP denylist tab.
To edit a denylist, select a denylist name, change the displayed information, and select Save.
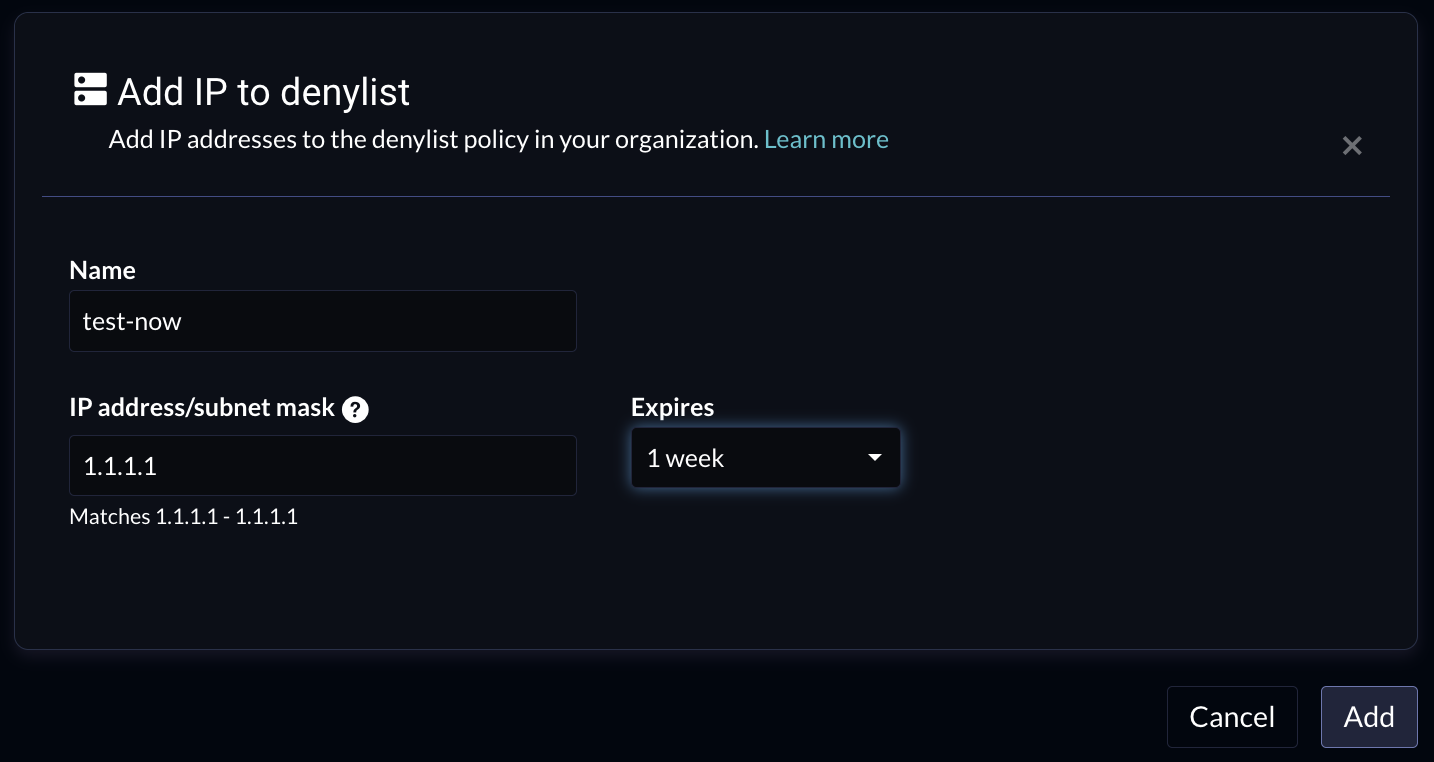
To add an IP address to a denylist, select Add IP to denylist, specify the details, and select Add.
Each denylist or allowlist entry applies to all environments (Development, QA, Production) by default. Once you save an entry, you can control which environments it applies to. Turn off the rule for specific environments by clearing the option where the rule should not apply.
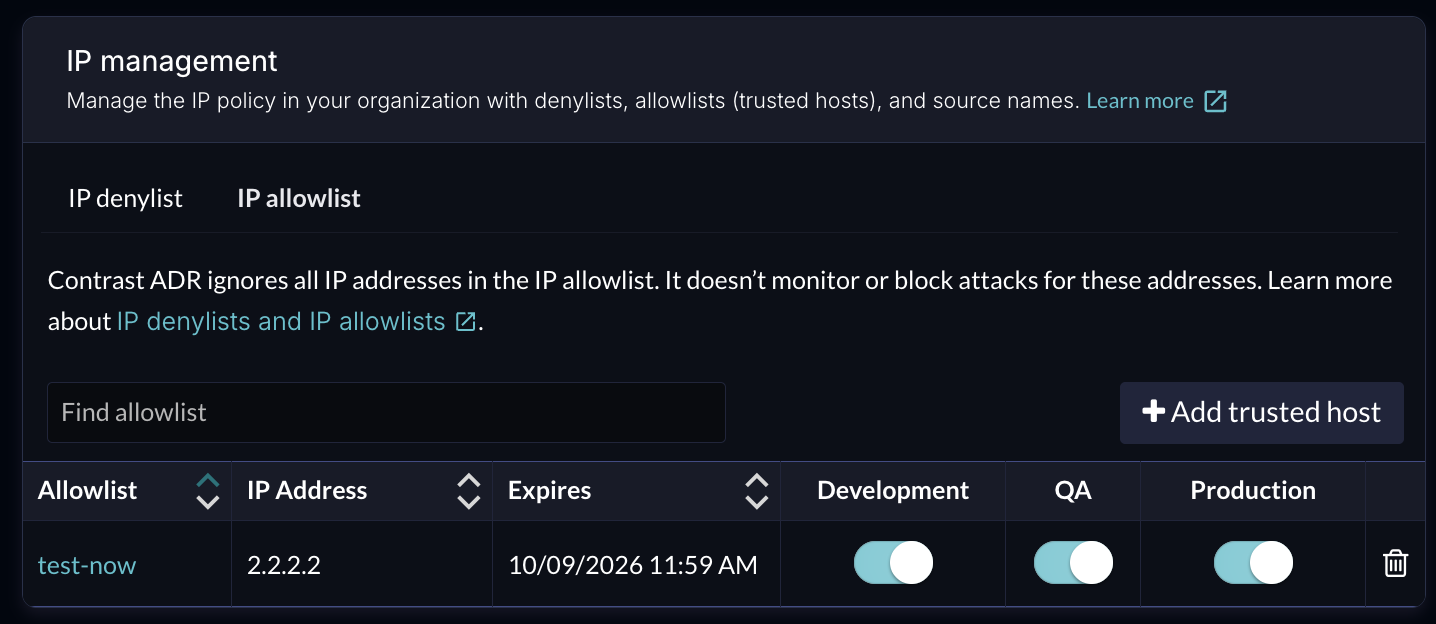
Manage allowlists:
Select the IP allowlist tab.
To edit an allowlist, select the allowlist name, change the displayed information, and select Save.
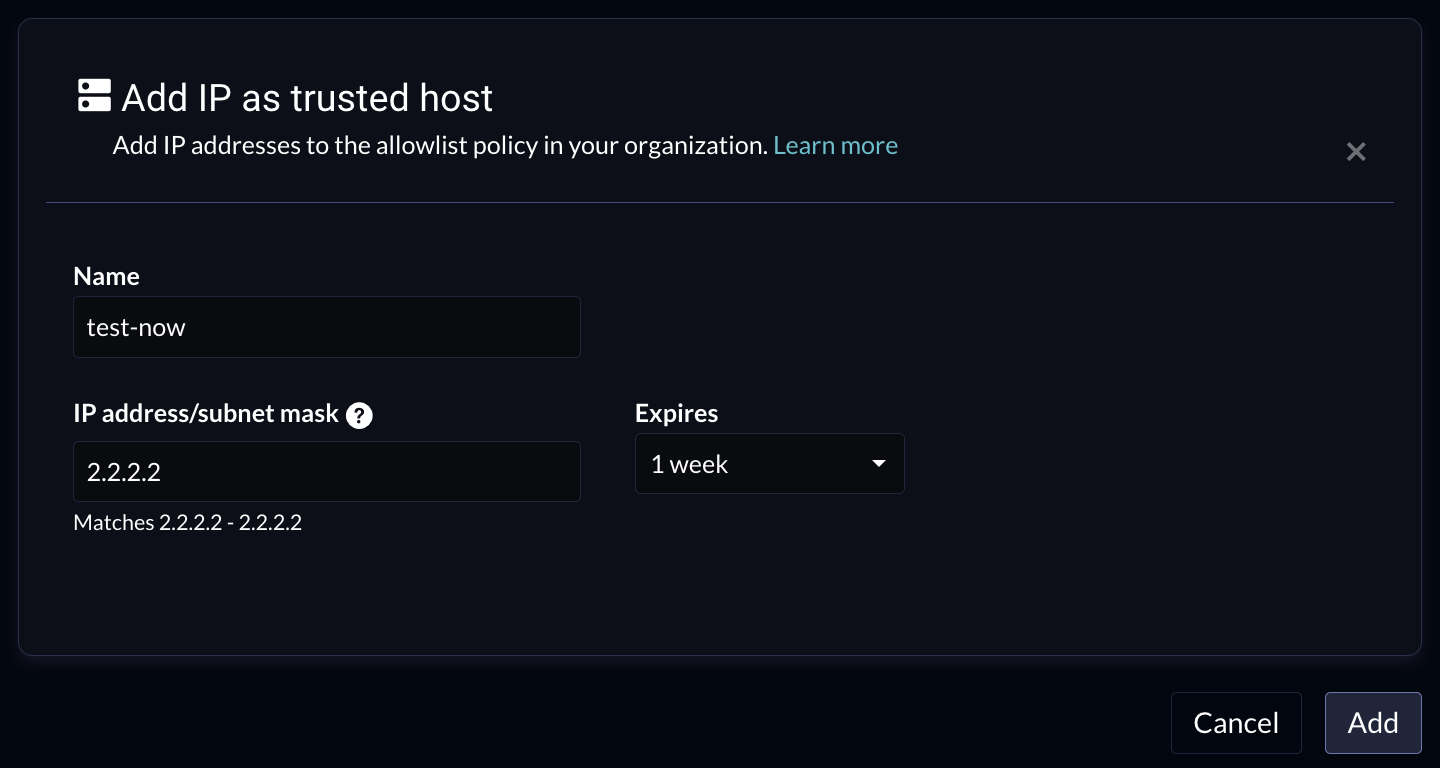
To add an trusted host to an allowlist, select Add trusted host, specify the details, and select Add:
Each denylist or allowlist entry applies to all environments (Development, QA, Production) by default. Once you save an entry, you can control which environments it applies to. Turn off the rule for specific environments by clearing the option where the rule should not apply.